Specified Lens Tests
Looking at more specified testing techniques that examine particular characteristics of a given lens.

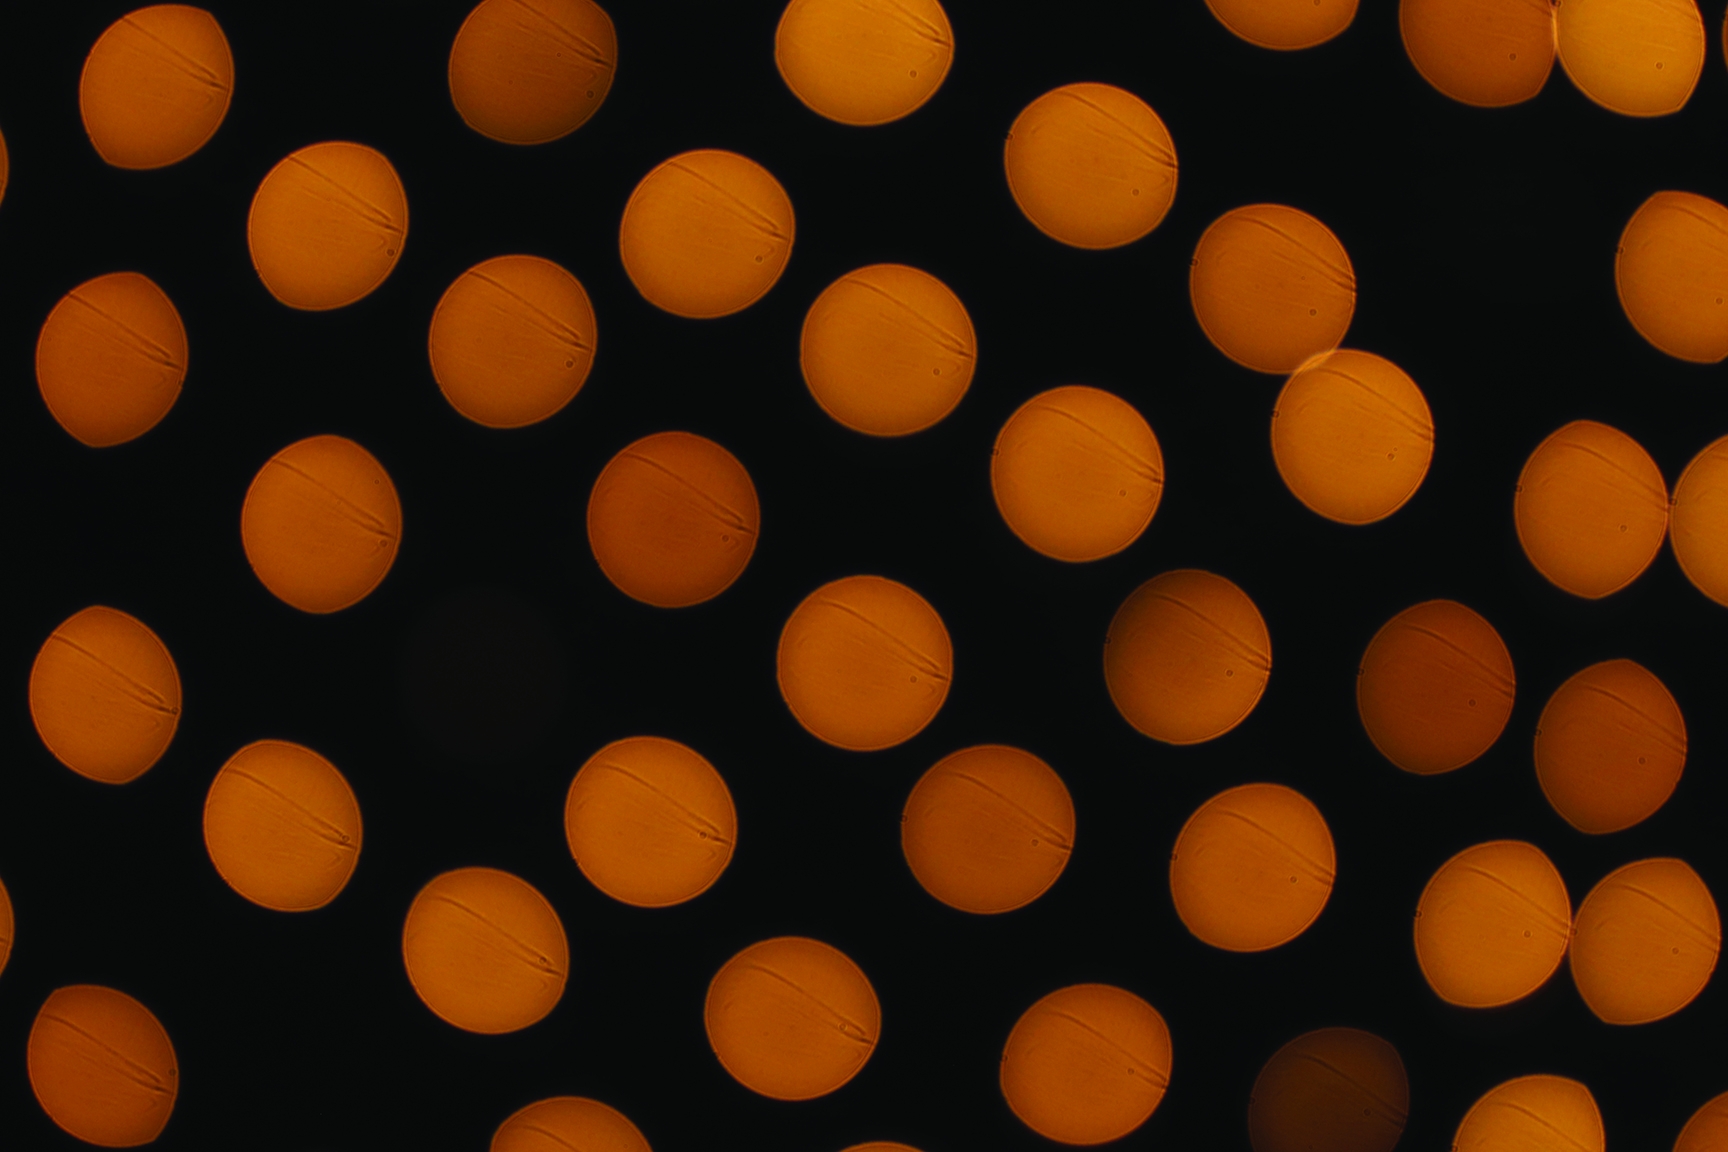
Bokeh and flare images courtesy of Jay Holben
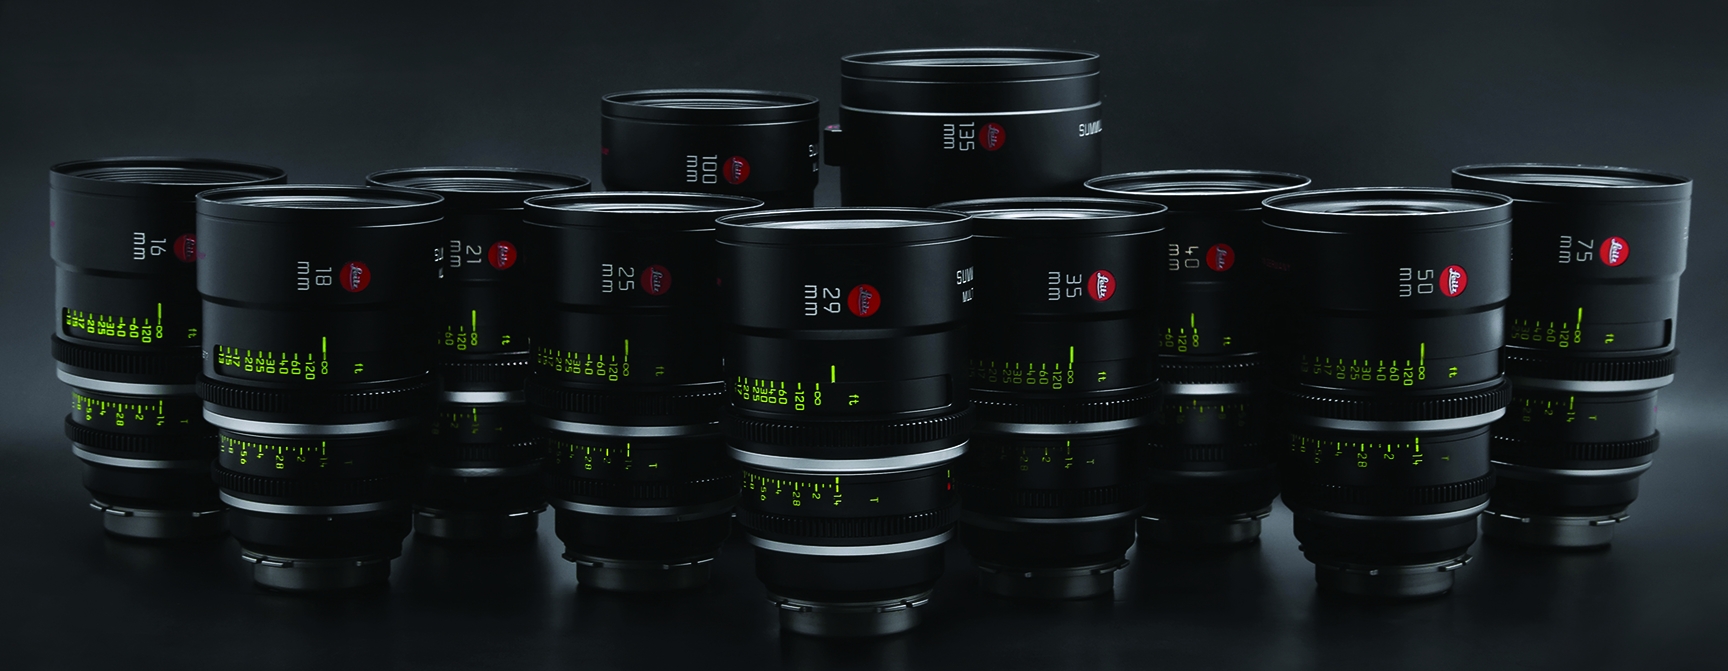
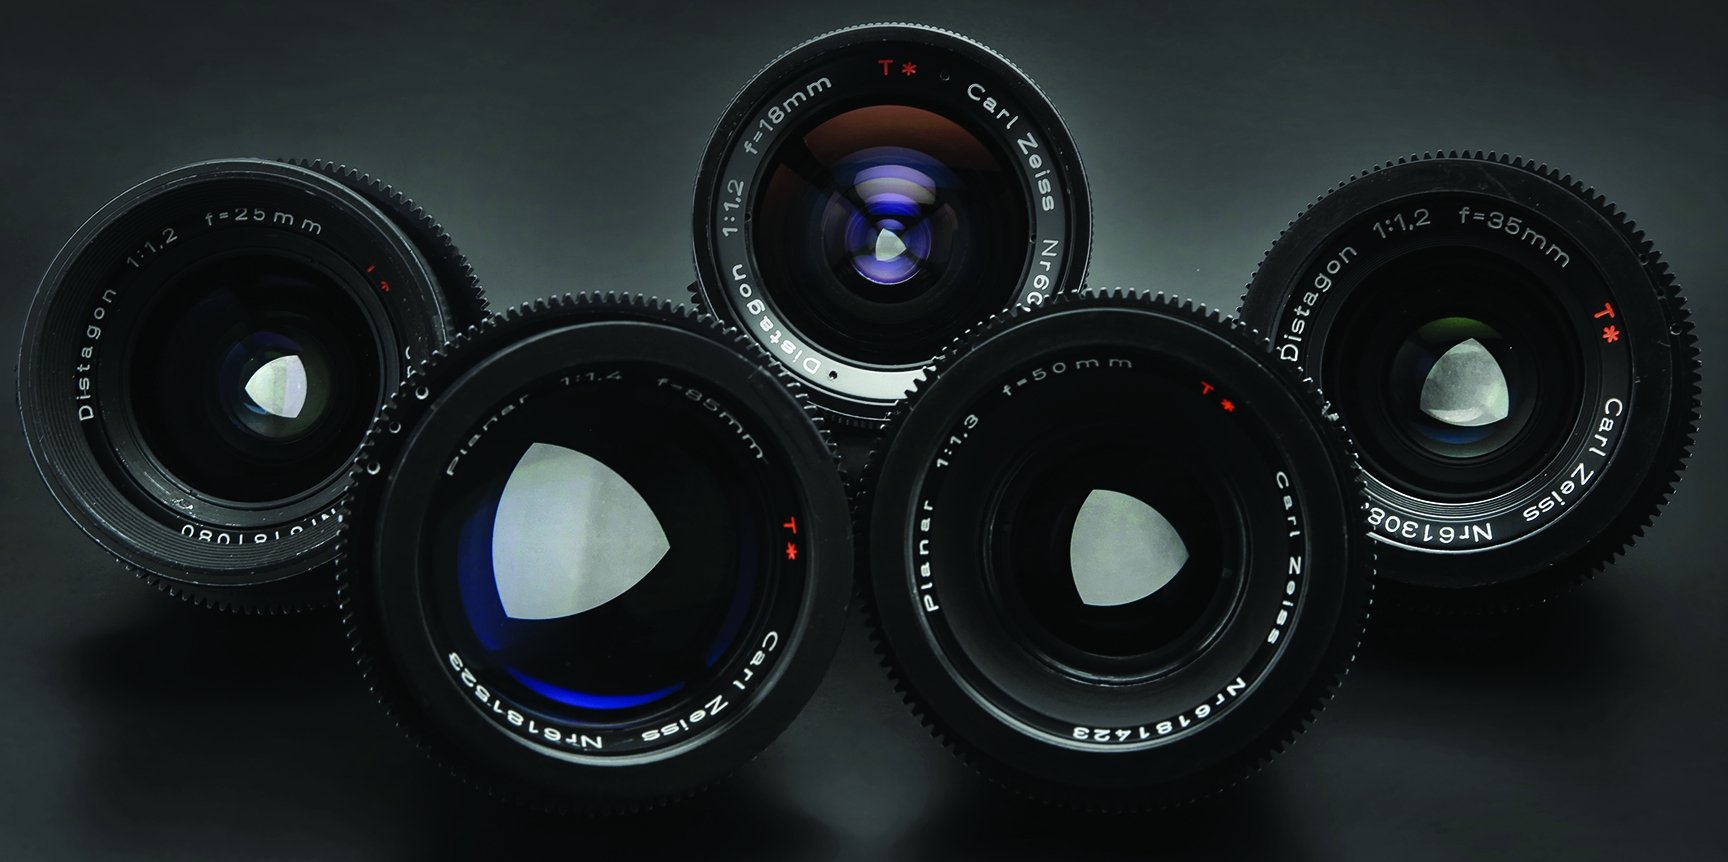
Lens photos by Christopher Probst, ASC
In a previous Shot Craft post, we covered the methodologies of a generic lens test. This month, we’ll take it a step further and look at more specified testing techniques that examine particular characteristics of a given lens.
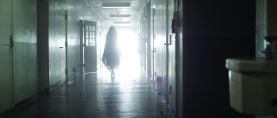
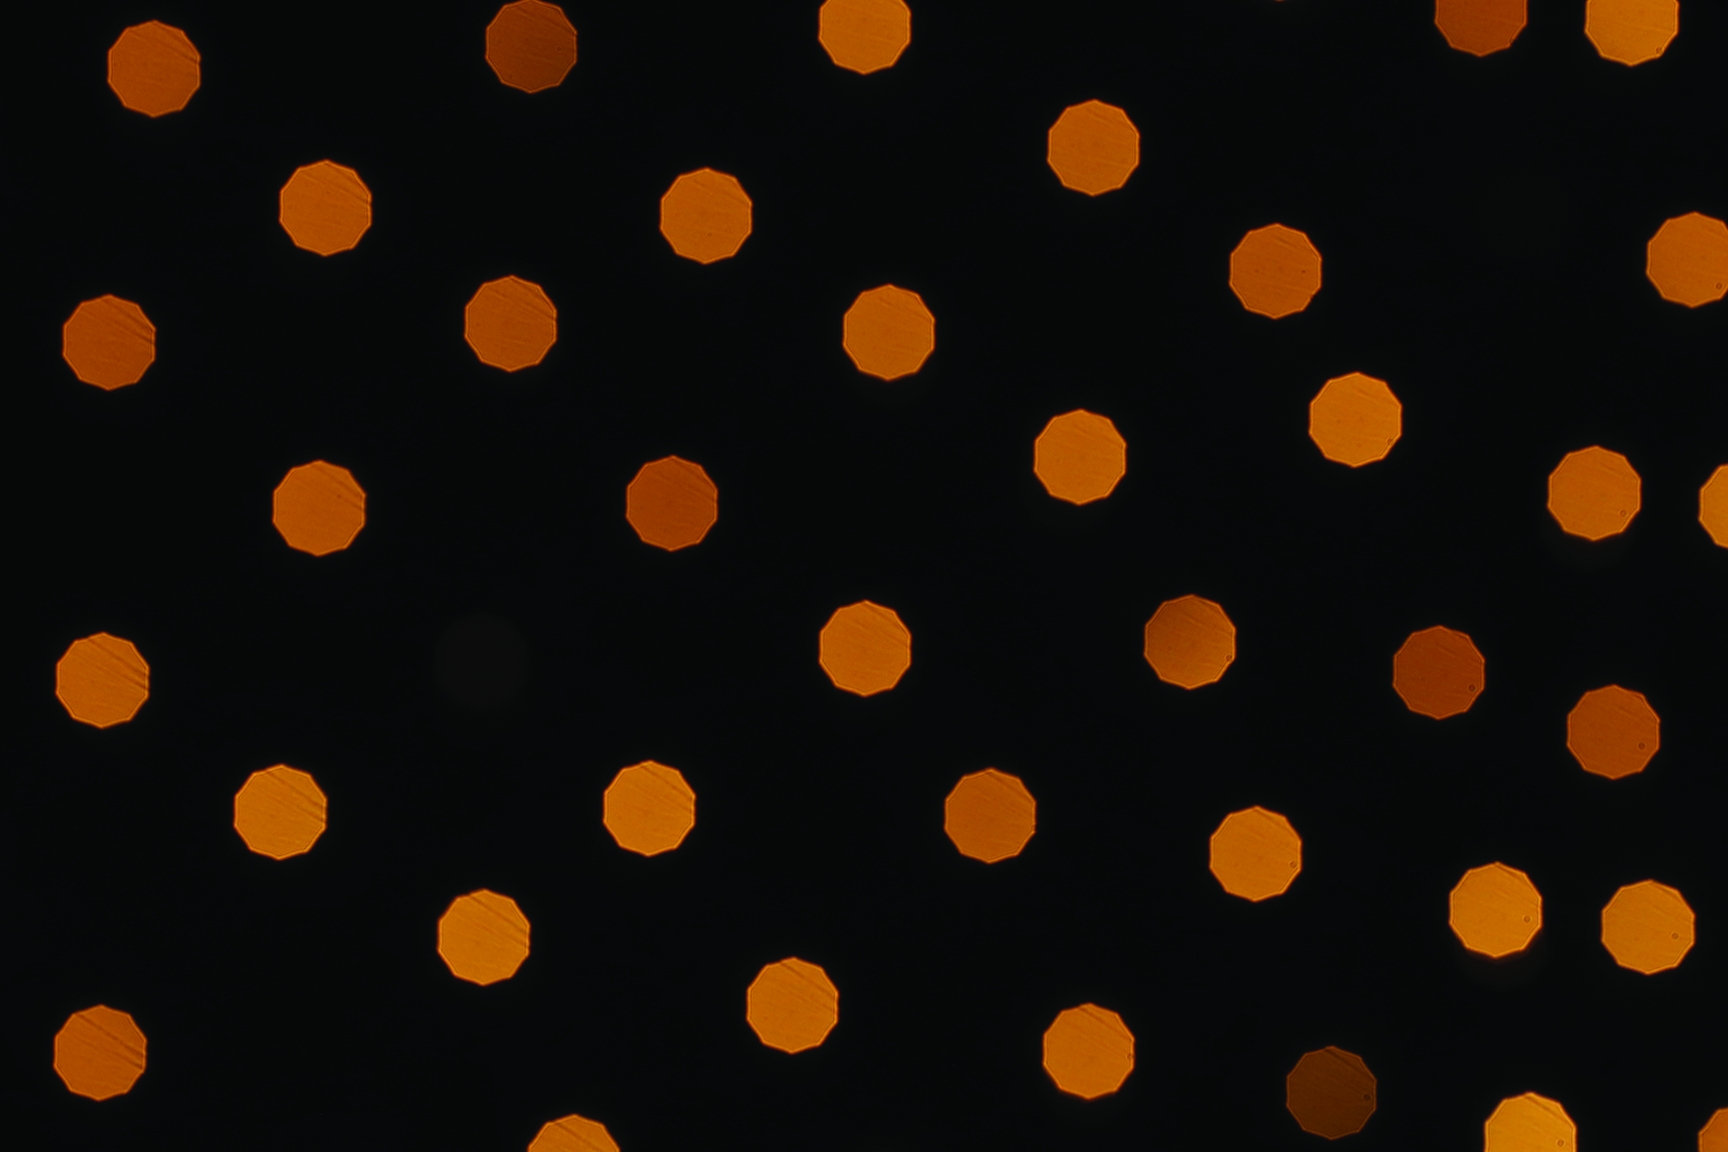
Bokeh
The out-of-focus portion of the image can be a leading factor in defining a feel and look, arguably more so than many other attributes or aberrations. It’s therefore not surprising that so much ado has been made about bokeh in recent years. The bokeh of a lens can really stand out.
While people often discuss bokeh as out-of-focus highlights, in actuality, bokeh describes all of the out-of-focus image — all points in the frame that are larger than the circle of confusion. It is merely that the out-of-focus highlights are where we can more easily discern what is happening with a lens’ bokeh.
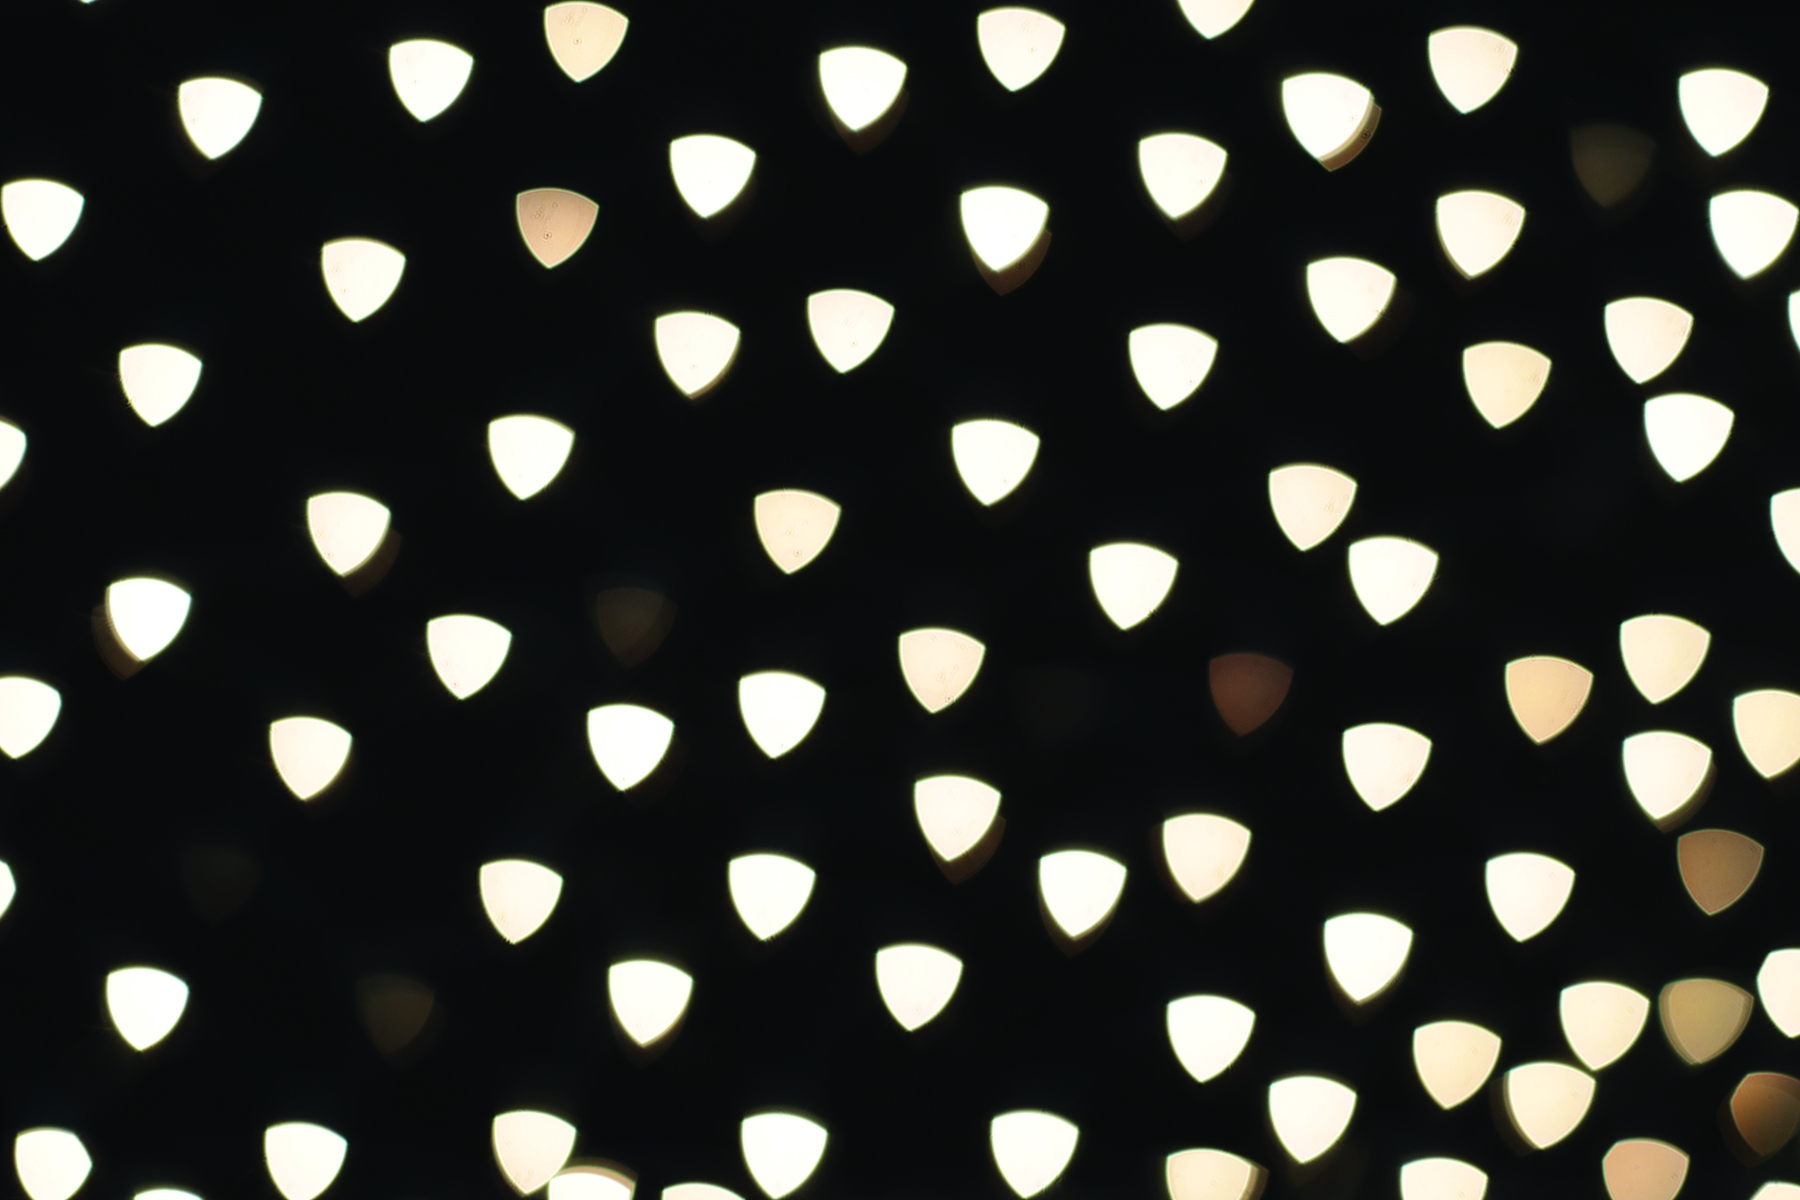
One of the best methods for revealing the bokeh of a lens is holiday twinkle lights. These small, bright point sources are excellent for providing the highlights that, when rendered out-of-focus, can reveal much about the character of a lens.
I prefer to use the “net” variety (in this post) instead of just a strand, as you get more spread-out sources for your buck — and the nature of a lens’ bokeh changes over the field of view that you’re looking at. It’s also important to use actual incandescent filament holiday lights, as the LED variety can cause problems with flicker at various frame rates and even weird color bias or sensor clipping.
Place the holiday twinkle lights in front of a black background for the cleanest representation of the bokeh. Positioning them about 8' away from the lens tends to be ideal, and allows for the ability to test both intra-focus (in front of the focus plane) and extra-focus (behind the focus plane) characteristics. You can do this by focusing the lens at minimum focus first, and then at infinity, to examine different qualities of spherical aberration, chromatic aberration and coma, and even to magnify design issues such as aspheric “onion ring” patterns.
When shooting the test, I’ll start with the lens wide open and compensate for exposure by adjusting the camera’s shutter angle (see the chart here), so that the holiday lights are exposed between middle gray and about a stop-and-a-half above. If they go too hot, you’ll lose details and the ability to see the character you’re looking for.
I’ll begin with minimum focus and then roll the camera. After a couple of seconds, I’ll slowly pan the camera so that the holiday lights move past the edge of frame — then slowly pan back in the other direction so the lights cross the entire frame to the other side. Repeat this for tilt if the lights don’t cover the full frame. At the end of the iteration, you want to make sure that you’ve seen holiday lights over every inch of the field of view. Then rack focus to infinity in the same iteration and repeat the pan/tilt actions. Cut, stop down 1 stop, and repeat the test.
This test works best at the wide apertures on the lens. As you stop down, you’ll increase depth of field and reduce the size of the bokeh balls. If your lens is too fast, however, especially with longer focal lengths, you may have huge bokeh balls that are overlapping, making it hard to discern the qualities. You may have to alter the focus of the lens to closer-than-infinity or farther-than-minimum object distance to adjust the size of the balls so they don’t overlap.
We’re looking for a lot of telltale signs here. If there is color fringing around the bokeh balls, for instance, that is a sign of chromatic aberration in the lens. This color fringing can change depending on the focus distance, and it can change from the center of the image to the edges. I’m always looking at the pupil occlusion, or what is also known as the “cat’s eye” or “Petzval swirl” effect, where oblique angles get cut off and the bokeh take on a more elliptical or “football” shape. This is lessened by stopping down the lens. An aspherical element in the optical design may create a bullseye pattern of concentric circles in the bokeh — aka the aforementioned onion rings. Some of the bokeh may distort at the edges of the frame, illustrating aspects of geometric distortion and coma.
Whether filmmakers perceive these phenomena — or essentially any of the lens characteristics described in this piece — as an annoyance or an emotionally affecting look depends, of course, on aesthetic sensibilities and the needs of the production at hand.
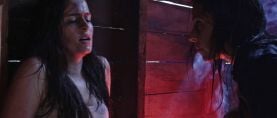
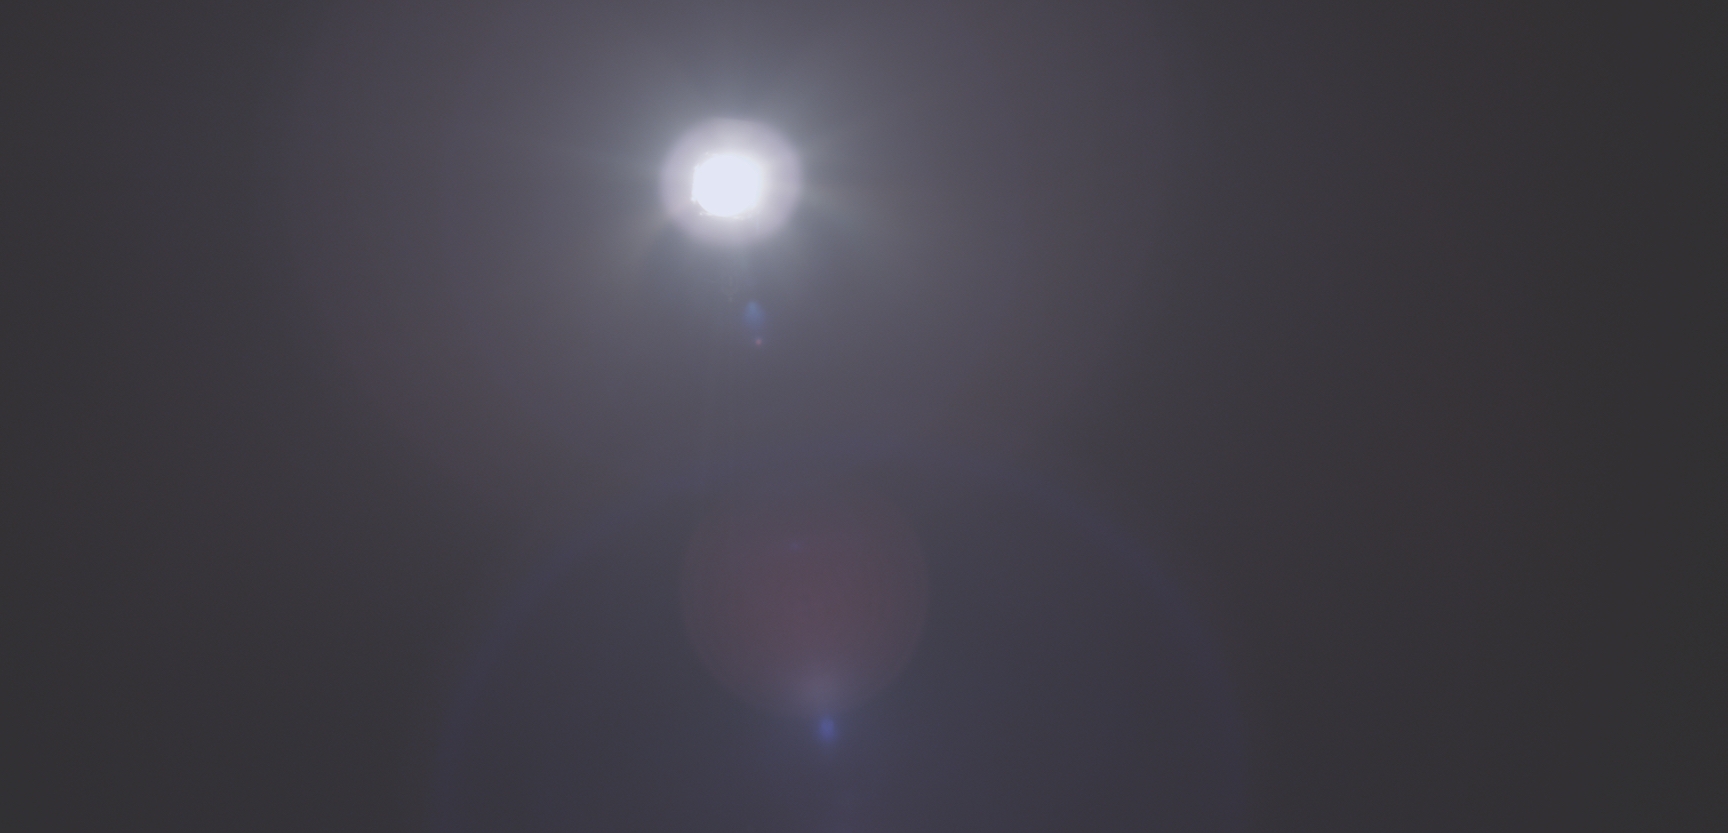
Flare Testing
Flare quality is another critical characteristic that a cinematographer examines when choosing a lens. Though optical and optomechanical designers work very hard to resist flare — as the less a lens is able to control aberrant light, the greater the reduction in the lens’ performance with regard to contrast, color and resolution — flares can affect the image in ways that are beautiful.
We’re all familiar with the classic spot flares (and their accompanying, ubiquitous line of orbs) that are achieved when there is a direct, bright source in the frame or just outside of it — yet even more significant to the character of a lens is its ability to control or allow veiling glare, a non-distinct loss of contrast, color and resolution that can lead to a “milking” of the blacks and an over-haze in the image.
Flare testing happens best with a single small point source. Some people like to use a flashlight, and this isn’t a bad choice, but I prefer a small tungsten Fresnel, perhaps a 150-watt. You can position this fixture about 8' away from the camera, in front of a black background. Then, pan the camera 90 degrees to one side, so that the light is actually shining on the body of the camera and not hitting any glass in the lens at all. It’s best if this can be done with the camera pointing at another black background such as a 4'x4' floppy. Then, slowly pan toward the light, going 180 degrees past the fixture to the other side of the room, where, ideally, you’ll have yet another floppy. This slow pan across the light source will reveal how soon the lens picks up veiling glare — and also the nature of the spot flare and “ghost” flare — as the lamp comes into and out of the shot.
Veiling glare will show up as a general loss of blacks — a lifting of the black level with no distinct shape to it. A lens with little veiling-glare control, for example, would tend to pick up flare just a few degrees into the pan, long before the lamp is seen in the lens’ angle of view. Once rays of light start to penetrate into the lens beyond the front element, you’re likely to see the beginnings of ghost flare and spot flare.
“It’s amazing what you can discover about
your favorite lenses.”
A ghost flare is a mirror reflection of the light source. Depending on where your focus is set in relation to the source, you may see a perfect representation of the lamp in the flare — even down to the shape of the tungsten filament! Spot flare generally takes on the shape of the lens’ iris or pupil, and you’ll often see an “orb” or pupil-shaped reflection for each element within the lens’ design. Spot and ghost flares are the hardest to control because they are derived from a bright source that is in the frame — i.e., within the lens’ angle of view.
We are also looking for other flare qualities with this test — such as “eyelash” flare (from reflection off inner mechanics or edges of the lens elements), ring flare (generally reflection off the inner barrel, but also off the inside of the edges of elements), caustics (light refraction through the edges of elements), and “amoeba”-shaped flare orbs (reflection off aspherical elements within the lens).
As the source passes through the frame, you can also determine the lens’ quality of diffraction, especially as you stop down the iris in later iterations. Light diffracting around the edges of the iris can create a starburst pattern around bright highlights in the image. Odd-numbered iris blades will create twice as many burst rays as an iris with an even number of blades. (For example, an iris with eight blades will produce eight burst rays, while a nine-bladed iris will produce 18 burst rays.) Rounder irises will have softer, less-defined starbursts (or none at all).
Slating
For both of the tests above, slating can be a bit of a challenge. Without having a backlit slate, it’s not possible to have it in shot the whole time, so I generally place it on a stand in the corner of the frame, such that it’s captured at the camera’s starting pan position. At the beginning of the take, I’ll shine a flashlight on the slate to make it readable and then turn it off for the rest of the take.
Charts
Although lens charts might be boring, you can learn a great deal about a lens from a properly photographed chart. Just some of the things that become readily apparent are contrast control, color bias, geometric distortion, resolution, edge-to-center performance, falloff (vignetting or shading), and chromatic aberration. It’s important to note that charts are designed to be photographed at a specific magnification, which means that each focal length needs to be a certain distance from the chart in order for the full array of the chart’s elements to be properly recorded. Often, this equates to merely filling the field of view with the chart, but that is not always the case. If you purchase a chart, be sure to check the instructions for the proper distance per focal length. My Century Precision chart requires a distance of 51 focal lengths — which means you multiply the focal length by 51. So, if I’m shooting with a 50mm lens, it needs to be 2,550mm (8.37') away from the chart, but a 25mm lens would only need to be 1,275mm (4.18') away.
Be sure to focus on the chart with the lens at its widest aperture, as focusing when stopping down may cause difficulty in critical focus, and the chart may fall out of focus as you open up the aperture.
The chart needs to be evenly lit with no hot spots, glare or shadows. Generally, use two fixtures set at about 45 degrees from the face of the chart.
All of these isolated tests combined — in addition to the generic testing we previously discussed — will teach you nearly everything you might want to know about the lens you’re examining. Be sure to set aside time to review the tests after you shoot, and compare various iterations. It’s amazing what you can discover about your favorite lenses!
The Still-Photography
Origins of “Bokeh”
“Bokeh” is a relatively new term to Western photographic language — and it’s interesting to note that it was the May/June 1997 installment of the still-photography journal Photo Techniques that first brought the word to popular attention in the U.S. John Kennerdell, Oren Grad and Harold Merklinger each wrote an article about bokeh, all of which were commissioned by editor Mike Johnston, who later said that he’d first learned of the term from photographer Carl Weese.
The word for this lens attribute — the concept of which had been appreciated and much discussed in Japan long before it reached our shores in earnest — is a variation of the Japanese term boke-aji, or just boke, which translates to “blur” or “haze.” (It is also the same term used to describe a psychological state of confusion or dizziness.) Johnston takes credit for adding the “h” on the end, which he did in the interest of correct pronunciation. As a sidebar in the Photo Techniques issue explains, “The word ‘bokeh’ is pronounced in two evenly stressed syllables, with ‘bo’ as in ‘bone’ and ‘ke’ as in ‘Kenneth.’”